Outlook Express Setup
How do I setup Outlook Express to allow me to collect my email from a new email account?
If you sign up with a new ISP you will probably have a new email account to collect email from.
Generally speaking you will want to continue to collect email from the old account as well, and
so you will need to configure a new account within Outlook Express. This article explains how.
This is also useful if you want to collect your work email from home as well as from work; to do this
look here first.
Before you proceed, make sure you have the following information to hand (it should be supplied by your
ISP):
- The Incoming mail (POP3) server address, often something like pop3.yourisp.net
- The Outgoing mail (SMTP) server address, often something like smtp.yourisp.net
- Your Account Name and Password.
- Your Email Address.
In some cases both server addresses will be the same - that's fine.
[Stage One...]
To setup the new account, first start Outlook Express and go to
Tools > Accounts, where you will be presented with a screen similar
to the following:
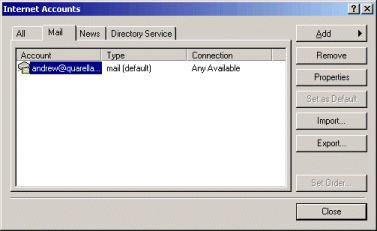
Click the Add button on the right and then select Mail.
You will be asked for information in stages as follows - enter each bit as requested then
click Next>
- The Display Name - this is just your name or however you like to be known. It will appear in any emails you send.
- Your Email Address. This should be your prefered email address, ie the one which people should reply to
when they reply to emails you send. If you have more than one email account then it doesn't have to be the one
associated with the account you are now setting up.
- The POP3 and SMTP server addresses. These are the values given to you by your ISP.
IMPORTANT: The SMTP address must be the one supplied by whichever ISP you
dial up to, and not necessarily the one for the account you are configuring. For example, if you dial
up to Freeserve but are now configuring Outlook Express to collect email from Demon then you
must enter Freeserve's SMTP address here, not Demon's. The POP3 address, on the other hand, must be
the one for the email account you are configuring (Demon in this example).
- Your Account Name and Password as supplied by your ISP.
Now that you have entered all your information, click Finish to complete the first stage.
[Stage Two...]
Unfortunately, Outlook Express only does half the job when configured automatically through
its wizard, so there are a few other bits to complete before we're really done.
You will see the new account listed using the pop3 server address you entered above as its name.
Make sure this new account is selected and click the Properties button on the right.
Change the name of mail account from the POP3 server address to something more meaningful, such as
"Mark's Freeserve email"
Fill in the Organization field to something appropriate such as your company name (you can
leave it blank if you prefer).
If you don't want to collect email for this account whenever you do a "send and receive", turn
off the option at the foot of the dialog.
If you are also collecting the email for thie new account elsewhere (eg at work) be sure to select
the Advanced tab, and tell Outlook Express to "Leave a copy of messages on server".
When done, click OK.
If you want this new account to be your main email account, tell Outlook Express this by clicking
Set As Default on the right.
When you are finished, click Close.